Ampletracks user tutorial - steel#
In this tutorial, we will be using the Demo instance of Ampletracks. You can follow along in two ways:
If you have a working instance of Ampletracks running, you can import the relevant Record Type schemata from our GitHub repository Ampletracks/Ampletracks
You can register your details and get an instance-on-demand for a week. Please see our instance-on-demand guide
Attention
Be sure to check your spam folder.
If you are setting up your own Ampletracks be sure to check the optional steps to ensure that you have all the appropriate records and relationship pairs specified. These will already be available on instance-on-demand.
Context#
In this tutorial we will assuming a study investigating the oxidation behaviour related to chromium content by weight % (wt.%) in three different steel compositions. Each of the three different steel compositions has increasing chromium content. We will be creating three bulk parent sample Records for each of these compositions. Each will be sectioned into to 5 regular 5mmx5mmx5mm child Record samples using wire electric discharge machining (wire EDM). These will then undergo thermogravimetric analysis in air. After that, the samples will be mounted in cold mounting resin and ground up to reveal the cross-section. Once the samples are prepared, they will be imaged with scanning electron microscopy (SEM) and analysed with energy dispersive X-ray spectroscopy (EDX).
For simplicity we will only be tracking 3 bulk parent samples and child samples in this tutorial. For a thorough tutorial, please use this guide Currently under construction.
This tutorial was partly inspired by the work of but will deviate from it.
Tutorial#
Ampletracks features#
This tutorial will familiarise you with the Ampletracks features of creating and cloning records, adding child records to parent records, and adding relationships between records of different type.
All sections of this tutorial will be accompanied by images below the steps. For steps which follow similar steps we will not be providing as many images.
Create a sub-project#
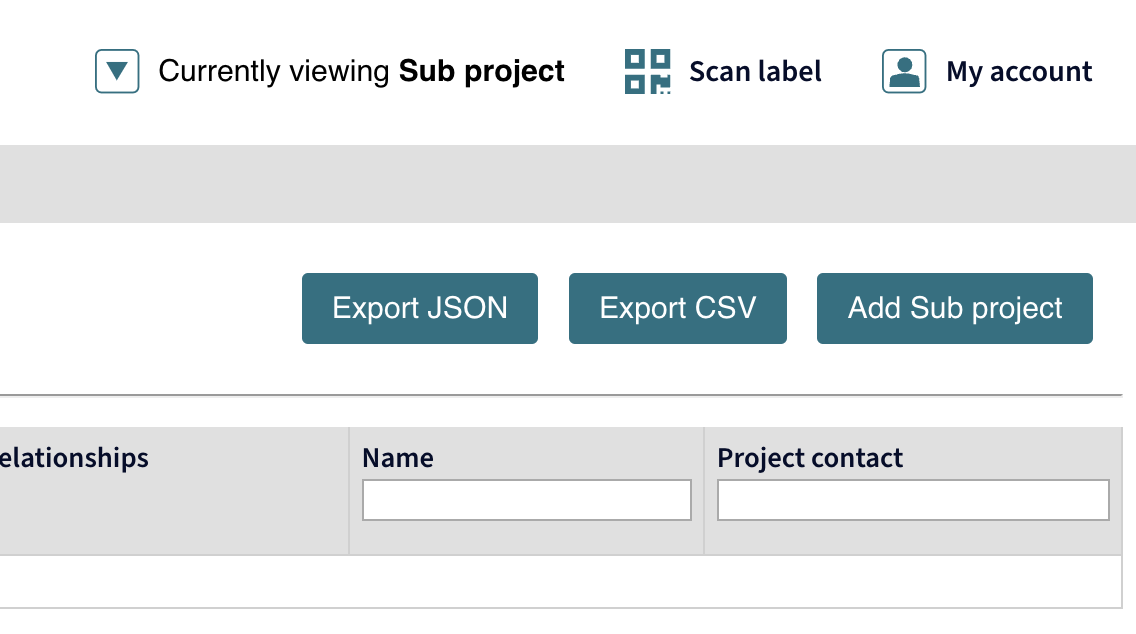
On the top right-hand side menu panel of the Ampletracks user interface (UI), ensure that you are Currently viewing Sub project Fig. 25
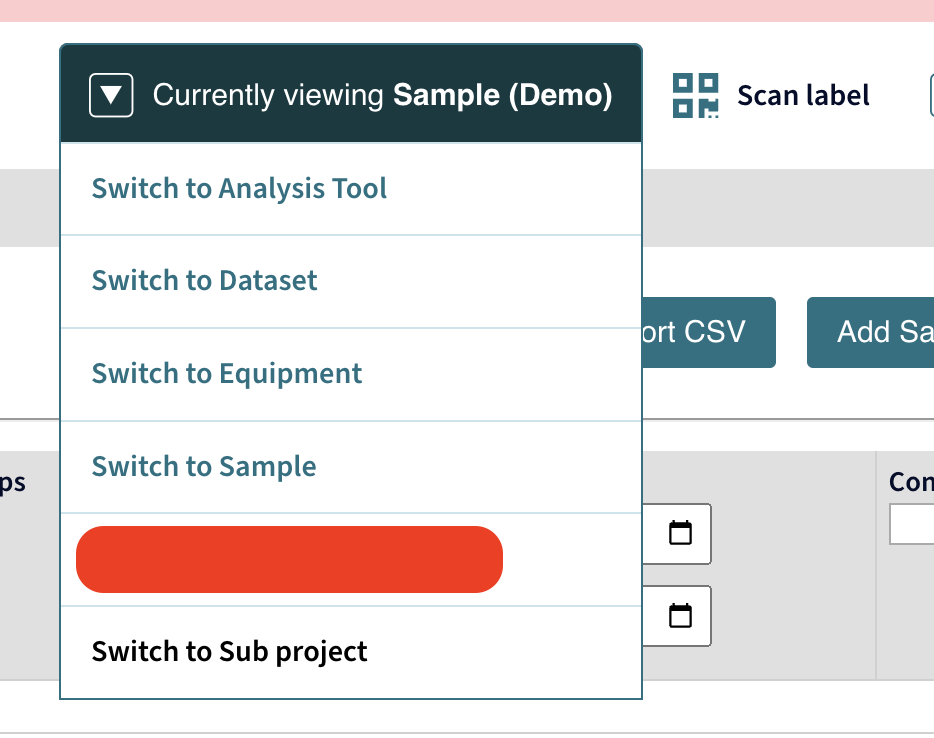
(optional) If you are not within the Sub project listing, navigate to the top right-hand side menu panel, hover over the bottom arrow and click on Switch to Sub project on the menu that appears Fig. 26
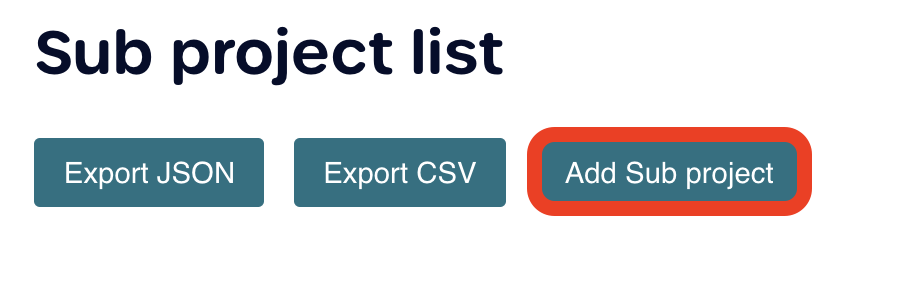
Click on the Add Sub project button, this should either be on the right-hand corner above the listing table or underneath the Sub project list title depending on the size of your viewport Fig. 27
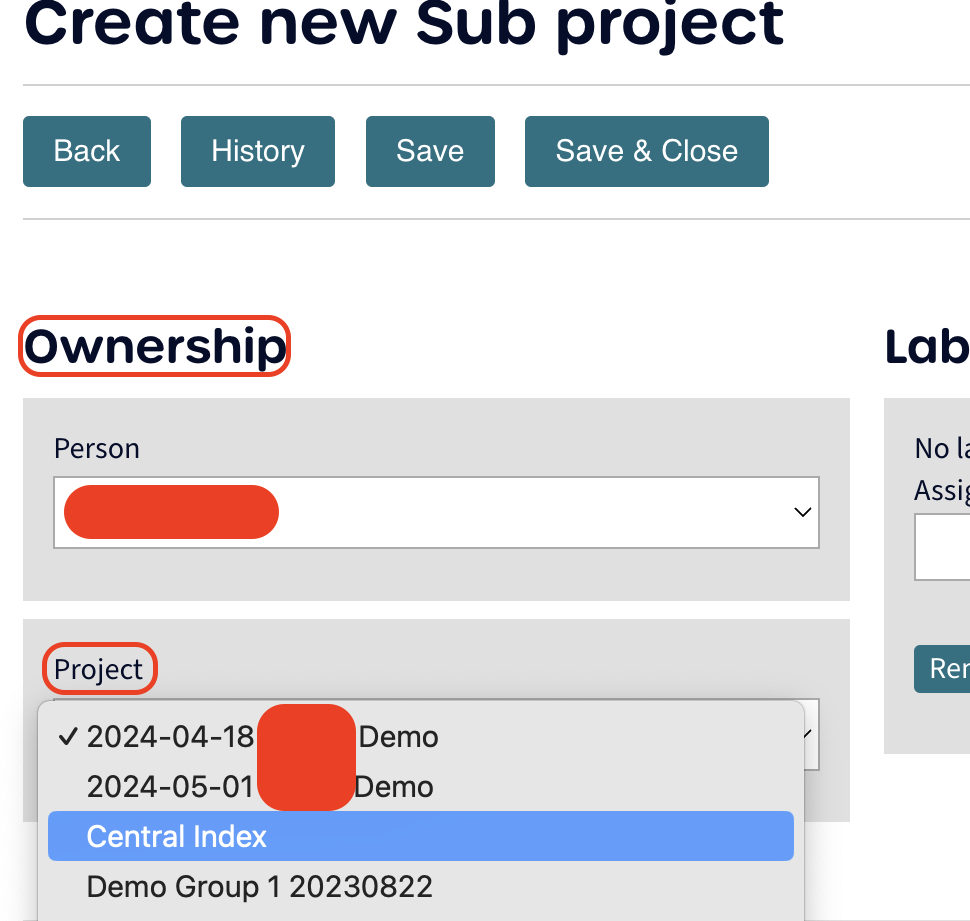
Ensure that the correct Project is selected under the Ownership section on the form, if you are part of multiple projects Fig. 28
Fill in the text boxes either by
Inspecting the form and filling any with relevant details as you see fit, or
Navigate to Project name: and fill the text box with
Oxidation behaviour of chromium containing steel
Navigate to Name of project contact and fill the text box with your name, an example name, or the person who is responsible for this project
Hint
This could be you, your principal investigator (PI) of the project, your PhD supervisor, or a postdoctoral researcher within your group that is supervising you.
Navigate to Project description and fill the text box with
Investigating the effect of increasing chromium content to the oxidation resistance of chromium containing steels, from 0 wt.% chromium to 1.0 wt.% chromium.
Populate the other fields at your discretion and to get a feel for the Sub project form
Click on the Save & Close button
You will be redirected back to list view
Create samples#
Create Sample#
On the top right-hand side menu panel of the Ampletracks user interface (UI), ensure that you are Currently viewing Sample (Demo)
(optional) If you are not within the Sample (Demo) listing, navigate to the top right-hand side menu panel, hover over the bottom arrow and click on Switch to Sample (Demo) on the menu that appears
Click on the Add Sample (Demo) button, this should either be on the right-hand corner above the listing table or underneath the Sub project list title depending on the size of your viewport
Ensure that the correct Project is selected under the Ownership section on the form, if you are part of multiple projects
Fill in the text boxes either by
Inspecting the form and filling any with relevant details as you see fit, or
Navigate to Unique name of the sample and fill the text box with a unique name, for the purposes of this tutorial the tutorial writer uses
Chromium steel 0000
Navigate to Material and fill the text box with
Steel alloy
Navigate to What is the composition of the sample and
Select the + button, you should see a periodic table open up Fig. 29
Select elements Carbon (C) Silicon (Si) Chromium (Cr) Manganese (Mn) Phosphorus (P) Surlfur(S) and Iron (Fe)
Select the wt.% composition declaration on the right-hand corner Fig. 30
Click on the number at the bottom right of the square housing Fe, set it to 1
Now repeat this for each of the other elements according to the table below, you will see that Fe balances automatically
Table 2 First parent sample composition# C
Si
Cr
Mn
P
S
Fe
0.00019
0.00011
0
0.00020
0.00015
0.00007
Bal.
Navigate to Has this sample been manufactured in-house or received? Select the radio button on the left of:
Received
The Who supplied this sample? field will now appear
Select
Research partners (Public research institution)
Scroll to Who is responsible for this sample?
Select the most appropriate choice for you
Fill in the contact fields as you please
Warning
For your privacy, please do not supply your personal information
Click on the Save & Close button
Investigating the effect of increasing chromium content to the oxidation resistance of chromium containing steels, from 0 wt.% chromium to 1.0 wt.% chromium.
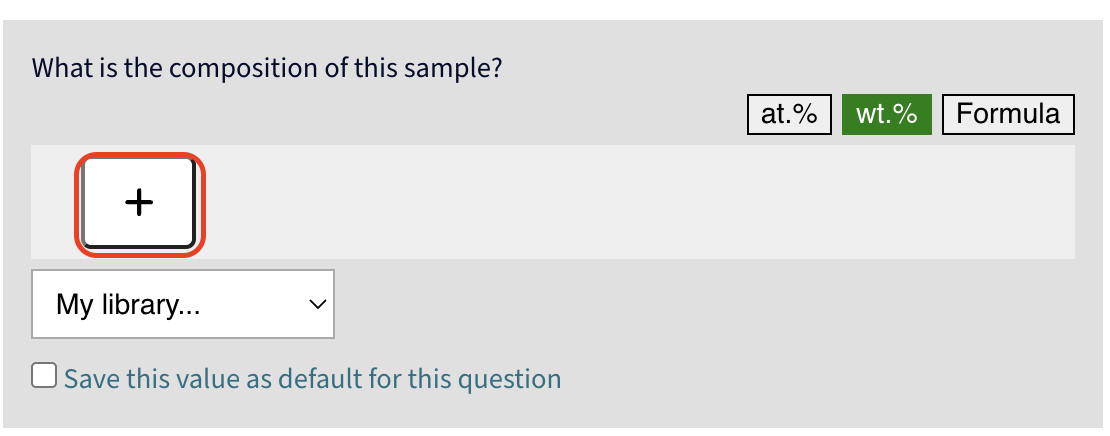
Fig. 29 Add elements to composition#
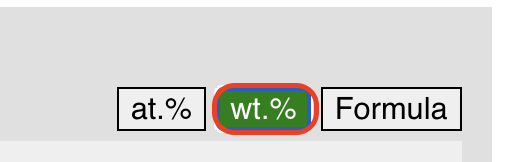
Fig. 30 Create composition with weight percent declaration#
Relate sample to sub-project#
Navigate to the sample we just created
Select the Edit button
Select the
-- Add new relationship --drop-down box under the Relationships sectionSelect is part of to create a Sample to Sub project relationship
Type in ‘oxi’ in the search box that will have appeared
Select the name you gave to your sub-project, which is Oxidation behaviour of chromium containing steel for the tutorial writers Fig. 31
Click on the Save & Close button
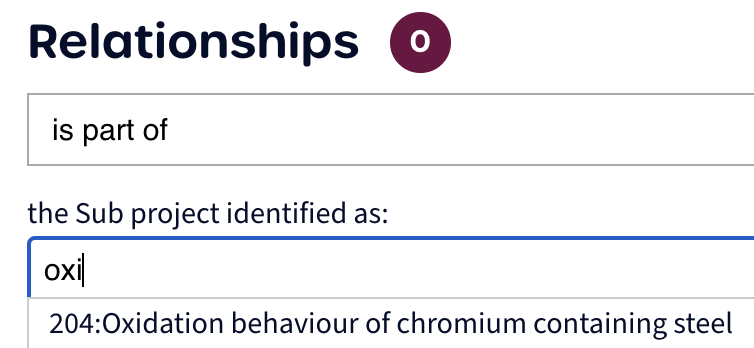
Fig. 31 Create relationship from Sample to Sub project#
Clone initial sample#
We will now create the next two bulk material samples by using the clone feature on Ampletracks.
Navigate to the Sample Record list view
Locate the sample record we just made
Hover over the cog icon
Select the Clone from the hover menu, you will be redirected to a sample form for the cloned Sample
Edit cloned Sample record
Click on the Edit button
Change the name to
Chromium steel 0005
Change the content of Chromium to 0.005
Click on the Save & Close button
Follow the steps outline in the section above to relate the sample to the sub project we created
Repeat all steps from step 1 - 6
Use the following name for the newly cloned sample
Chromium steel 0010
Change the content of Chromium to 0.01
Create child samples#
Caution
For simplicity, we will only be creating child samples for the sample we named
Chromium steel 0005
Navigate to the Sample Record list view
Locate the sample record ‘Chromium steel 0005’
Hover over the cog icon
Select the Add Child from the hover menu, you will be redirected to a sample form for the child Sample
Change the name to
Chromium steel 0005 EDM cube 01
Explore other fields
Fill in other fields within the form as you see fit for the sample and our known process history
Click on the Save button
Scroll up to the Relationships section
Click on the
--- Add new relationship ---drop down menuSelect
was made using
Type ‘EDM’ into the search box, or the most appropriate Equipment name for you
Select the piece of equipment
Click on the Save button
Click on the Save button
Explore what other relationships and with what pieces of equipment are available to the Sample record type
Create a relationship between the record and your Sub project
Hint
You can search for records to relate to the currently active record using your name within the Ampletracks app
Click on the Save & Close button
Repeat steps 1 - 6 twice
Name the new child samples ‘Chromium steel 0005 EDM cube 02’ and ‘Chromium steel 0005 EDM cube 03’
Locate sample record ‘Chromium steel 0005’
Click on the Edit button
Navigate to Process history field
Update the Process history field with
Was machined by wire EDM to produce 3 cubic 5mmx5mmx5mm child samples
Hint
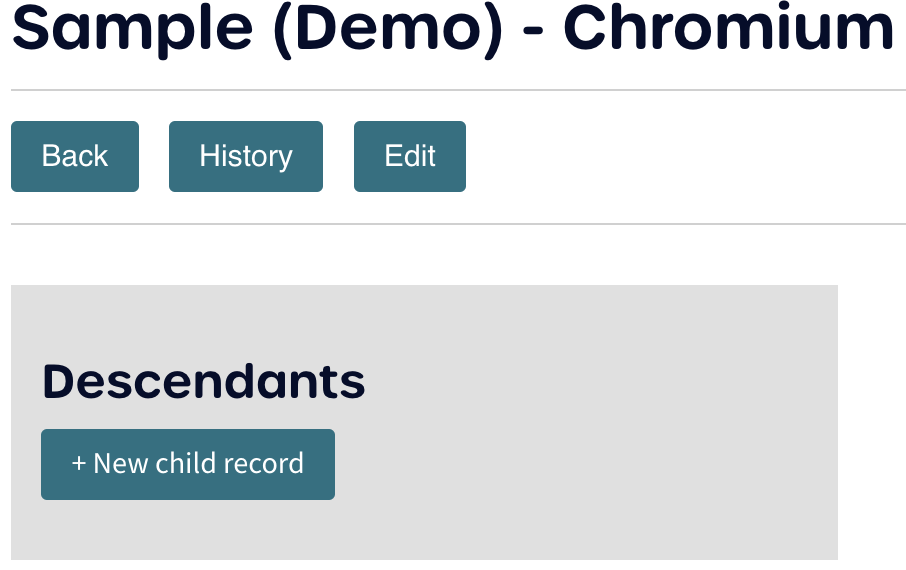
Another method to create a child record is to navigate to the record we are interested in and click on the + New child record button under the Descendants title
Relate samples to other records#
Equipment#
We have see above how to create relationships between pre-existing records such as equipment.
Look at what other types of relationships exist for samples
Is there a rewlationship that satisfies characterisation?
Can you identify a piece of equipment to relate the sample to?
Creating a record on relationship - Dataset#
For this part of the tutorial we are assuming that we have imaged our sample already and created a relationship with the equipment that imaged it
Navigate to your sample of interest
Click on on the Edit button
Scroll to the Relationships section
Click on the
--- Add new relationship ---drop down menuSelect
was measured to produce
Start typing in the text box the name of the Dataset record we want to create
Hint
You only need 3 characters for search to begin. You can use wilcard characters such as
%%%or___to show everything you have available for relationship creation between records.Click on Add new record. You will be redirected to a Dataset creation page
Fill in the details of your dataset
Click on the Save button
Optional steps#
For the following step you will need to be granted elevated access to an administrative role at the project level.
You might have noticed that we have yet to create a piece of equipment for sample preparation, such as a sample mounting press and a horizontal grinding wheel.
In the following set of instructions, create an equipment record for either of these pieces of equipment, or a piece of characterisation equipment that you think is necessary for this study.
Create equipment#
Switch to the Equipement record type listing
Click on the Add Equipment button
Make sure that the project we are registering this piece of equipment under is ‘Central Index’

Fig. 32 Project select drop-down menu in record creation#
Fill in the equipment record with the appropriate details
Click on the Save & Close button
Changing user records#
When elevated to an administrative role at the Project level, you will have the permission to change records from within the Projects you have access to.
Try changing a record you do not own
Has the UI changed?
How?
What other features do you have access to?
Record ownership transfer
Try changing the owner of a record from one user to another